Adding Customer Specific Collateral
Add and manage assets, such as case studies and customer videos, associated with a customer. Collateral that is customer-specific is also known as a managed asset. A managed asset is a reference phone call, interview, or any other type of asset that requires participation. Managed assets need to be “managed” through the reference process to avoid reference fatigue.
Note: Customer specific collateral can also be added directly to the customer record. For more information, see Editing Customer Information.
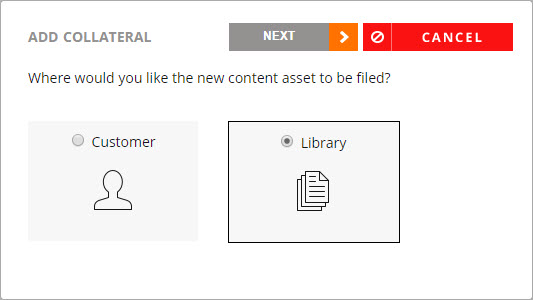
- Click the New Collateral icon. The Add Collateral dialog will appear.
- Select Customer so your new collateral will be associated with a customer.
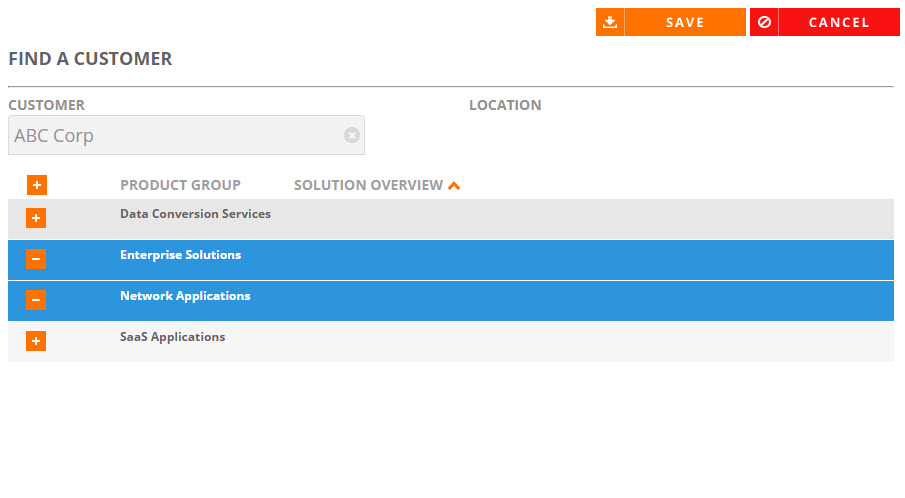
- Click Next. The Find a Customer page will appear.
- Find an existing customer using the Customer Search.
- If applicable, select the Product Group(s) you wish to associate with the new collateral using the
 button.
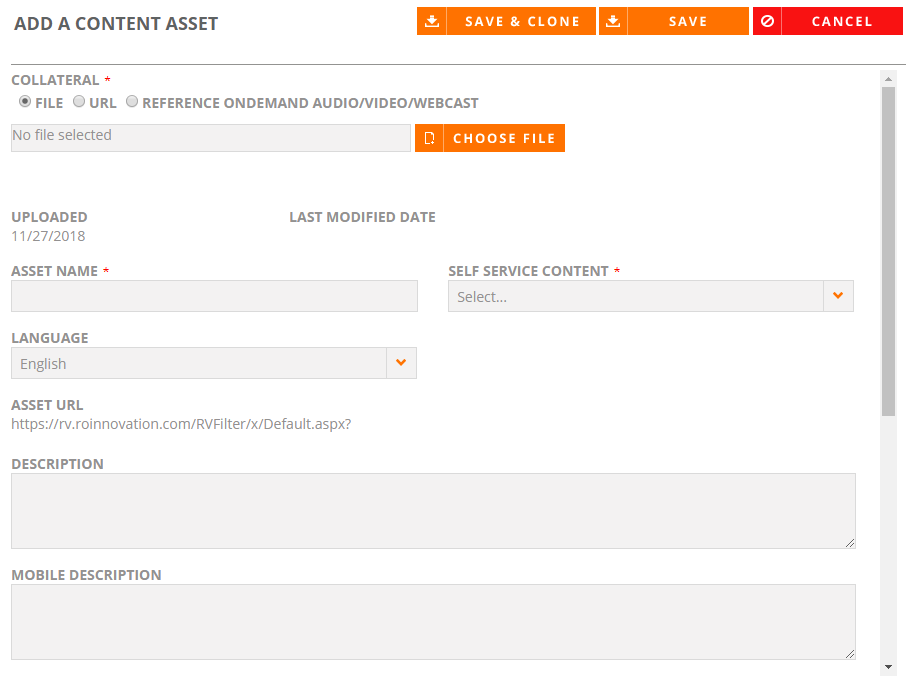
 - Click Save. The Add a Content Asset page will appear.
- Add Collateral by uploading a file, entering a document URL, or adding a Reference OnDemand Audio/Video/Webast.
- Add the following information:
- Asset: Add content assets by uploading a file or entering a document URL.
- Content Asset: This is the type of asset you are uploading, such as a case study, customer video, etc.
- Managed: Select No if loading a content asset. Disable this field for all self-service content assets. Enable this field if approval is needed to use the content.
- Description: This will display within the Description section of the Asset search results screen.
- Status: Set this field to Active if the asset should be available in search. Set this field to Inactive if the asset is expired.
- Asset Search: Enable this field if the asset should be available in search for all users.
- Limit: This field sets a limit on the number of uses for a reference participation asset (e.g. participate as a peer-to-peer reference). This field should remain blank for all self-service content assets.
- Expiration: Set an expiration date if you want the asset to expire and not be available for use after a certain time period. The default expiration date is set to 5 years.
Note: If integrated with Salesforce, you can enable your collateral for Quick Plays. For more information, see: Salesforce.
- Click Save. Click Save & Clone to create a copy of the new content asset as you are saving it.

Note: Depending on your company's configuration, you may be selecting Solution Group(s), Product(s), Product Group(s) or various other options.
Adding Non-Customer Specific Collateral
Collateral that is not customer-specific is also known as a standalone or unmanaged asset. An unmanaged asset is a published document or media file created in conjunction with a customer reference. This type of reference asset requires NO reference program approval prior to asset use (e.g. logos, case studies, customer videos, etc.) and can be accessed at any time.
- Click the New Collateral icon. The Add Collateral dialog will appear.
- Select Library so your new collateral is not associated with a customer.
- Click Next. The Add a Content Asset page will appear.
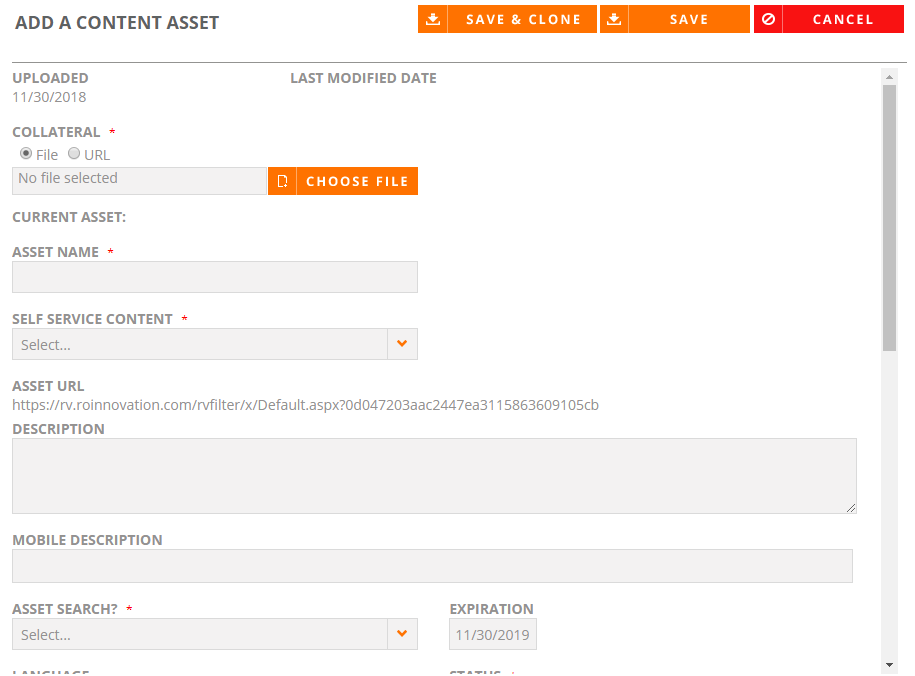
- Populate the following asset information:
- Collateral: Add content assets by uploading a file or entering a document URL.
- Content Asset: This is the type of asset you are uploading, such as a case study, customer video, etc.
- Asset Title: This is the name of the asset you are uploading.
- Description: This will display on a Spotlight when the asset is selected and within the Description section of the Asset search results screen.
- Asset Search: Enable this field if the asset should be available in search for all users.
- Expiration: Set an expiration date if you want the asset to expire and not be available for use after a certain time period.
- Status: Set this field to Active if the asset should be available in search. Set this field to Inactive if the asset is expired.
Note: If integrated with Salesforce, you can enable your collateral for Quick Plays. For more information, see: Salesforce.
- Click Save. Click Save & Clone to create a copy of the content asset as you are saving it.
Note: If you are uploading multiple assets with similar tagging, you can click Save and Clone to expedite the process.
To know about how marketing users can add and edit a collateral, see: Adding & Editing Collateral.